Themify has their own Page Builder which is integrated into the Themify settings in the backend and can be activated on the Frontend.
The Themify Builder 2021 version.
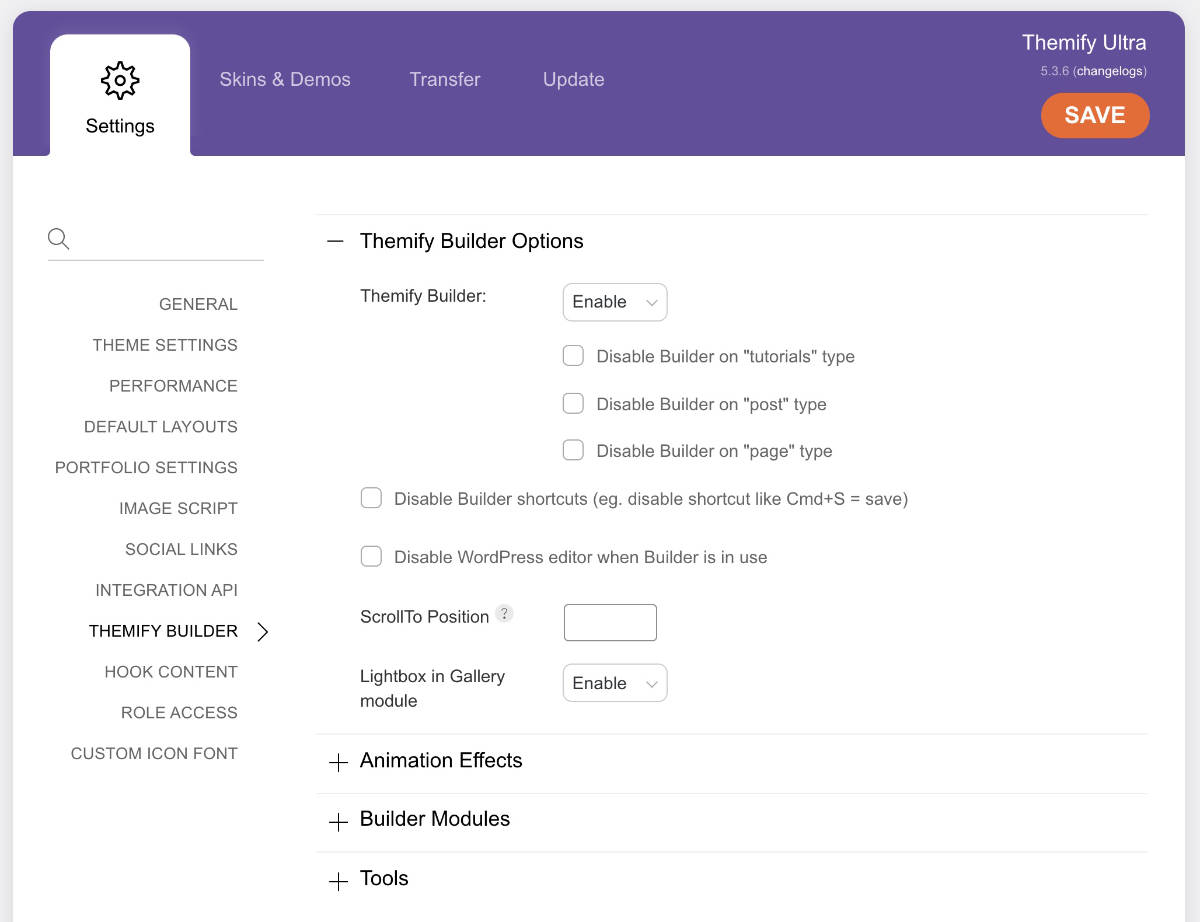
Themify Ultra -> Settings -> Themify Builder
One way to activate the builder is go to to the Frontend and select the page/post you need to adjust, and in the top black admin bar click “Turn On Builder”. The result will be something like this:

There are on the right side Rows containing columns.
Various Modules that can be dragged and dropped into the layout.
Blocks also called Patterns in Gutenberg that can be added.
A Saved section to where one can load in Rows, Modules or Layout Parts.
Along the top bar are various options. All contain a tool tip that shows up on hovering the mouse on top of each icon.
The Themify Builder 2013 version.
The following is the tutorial I wrote 26 August 2013 about the Themify Builder. I will include some of the screens from that time.
https://themify.me/
https://themify.me/docs/builder
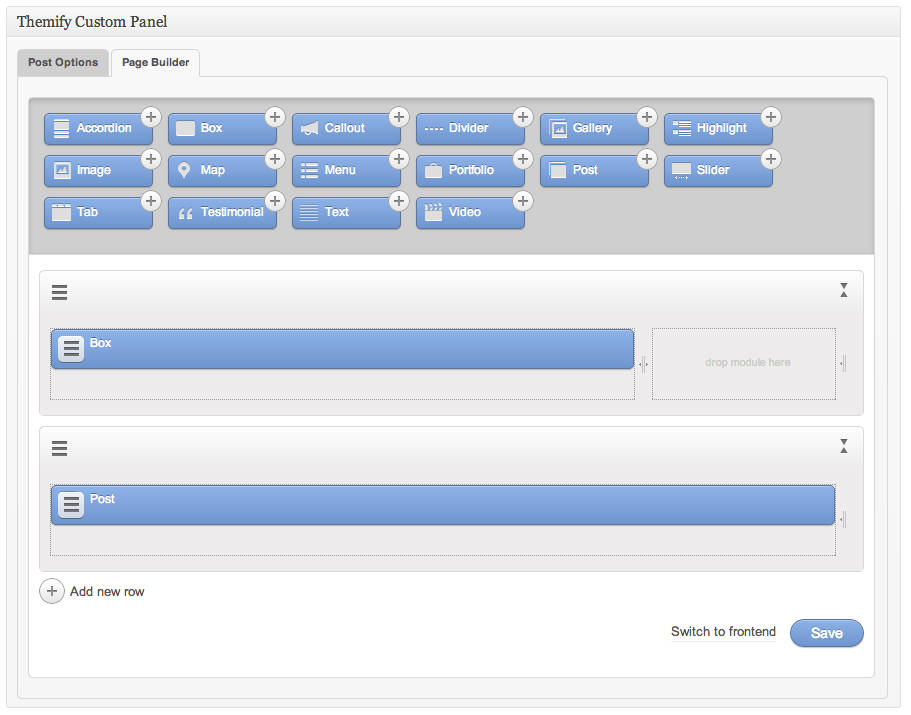
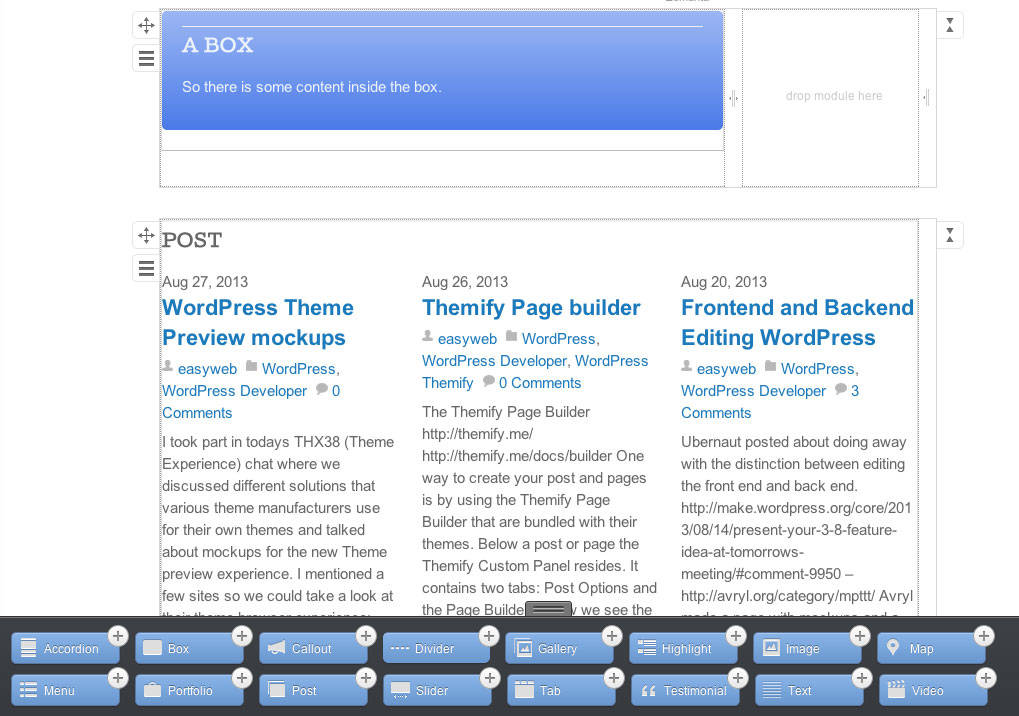
One way to create your post and pages is by using the Themify Page Builder that are bundled with their themes.
Below a post or page the Themify Custom Panel resides.
It contains two tabs: Post Options and the Page Builder.
Below we see the Page Builder tab selected. These are drag and drop modules. Drag a module to a row and drop it. Options for the specific module will come up so you can fill in the information you need and click Save.
More on these various options will follow further below.
As you can see I have already dragged and dropped the Box module into a row. A row consists of four columns. The below box covers three columns. Which can be adjusted by dragging the area to the right of the Box – either left or right. Having the module cover from one column and up to four columns.
In the row below the Box I have added another row. Here the Post module covers all four columns.
NB! If your having difficulty with another sidebar coming up on the post/page.
Then select the the Post/Page Options tab and be sure to select Sidebar Option: Full Width (the white square).
Here are two of the modules from the 2013 version of the Themify Builder.

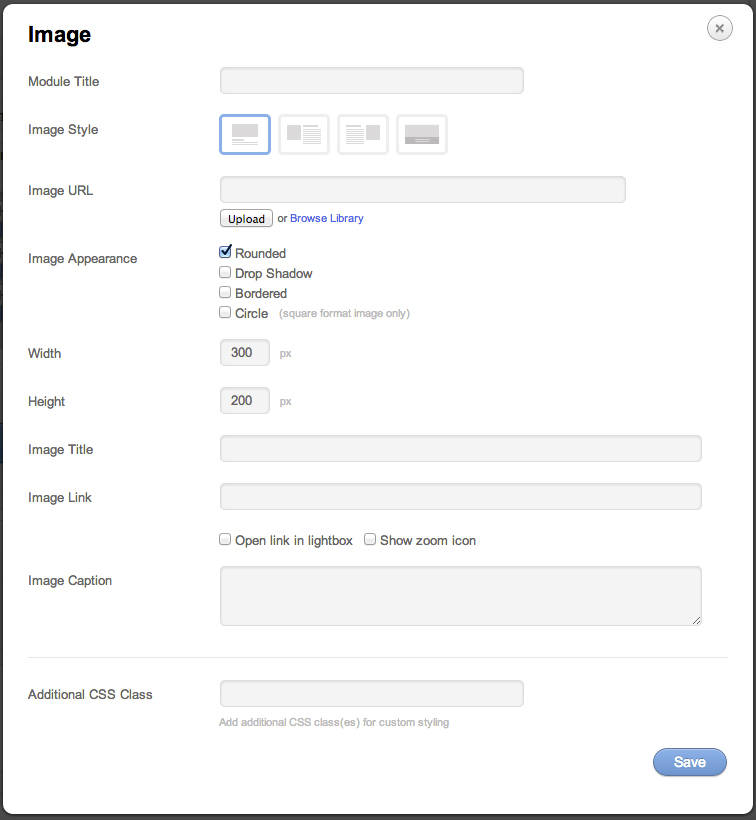
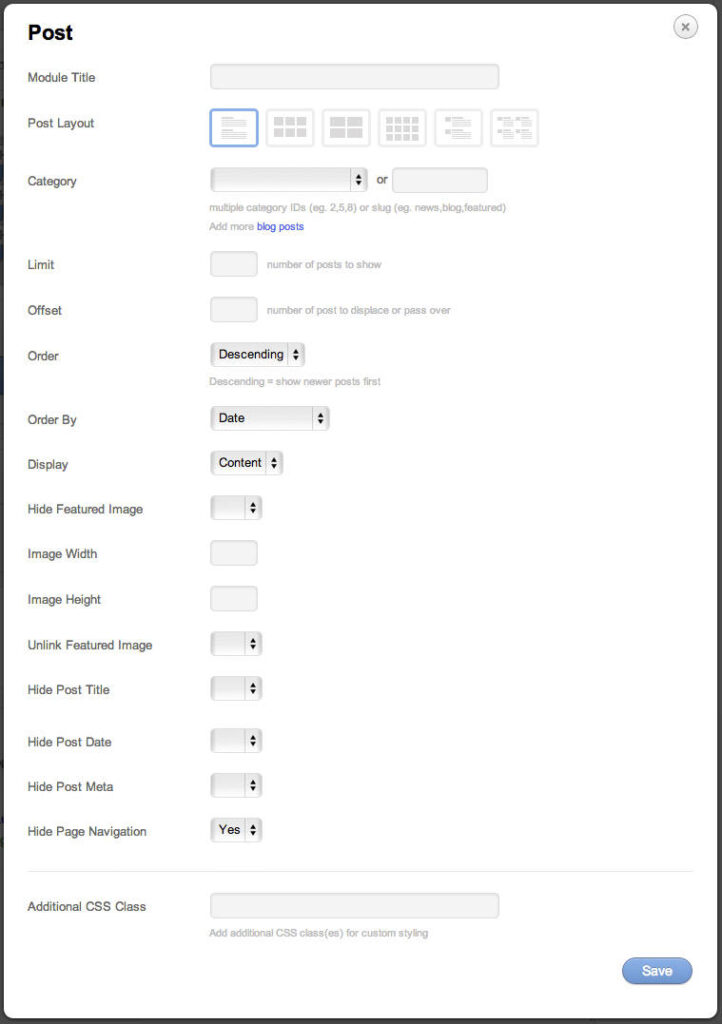
There are a lot of options in the dialog boxes. At the end of the box one can also add in a CSS class to add additional code.
Switching to the front end is easy to do just click the front end button. On the front end drag the modules around.Hover the mouse over a module and see the options to edit the module.
One of the inherit problems with the above content blocks is that the main focus of building a page is the content blocks and not the flow of the text to where content blocks are added.
Another matter that comes up is that content blocks can not be nested.
Here one can add a box and add content inside the dialog area of the box. For the above gallery I used a shortcode to add the blue box around the gallery.
Reusing content. What is a good way to reuse a page/post elsewhere?
What about adding a duplicate under a post/page in the All Posts/Pages listing. In the Quick bar area.
Themify are planning on adding a way to save a layout and use it again in another page.


